CapCut Video Studio guide: From an idea to a finished video
A practical walkthrough of the real workflow: entry points, single-shot settings, the Agent, Video Brief, Storyboard, and six canvas card types—then fixing bad takes, fine-cutting in Edit More, and exporting.
- CapCut Video Studio is a canvas-based AI video workspace: you start by organizing ideas and assets, then use the Agent, Brief, and Storyboard to shape the structure, before generating shots, fine-cutting, and exporting.
- Don't start with a ten-minute epic. Begin with a short piece of 20–40 seconds and 3–5 shots to validate the key moments, then scale up.
- Per-shot parameters of 5–15 seconds and full-video lengths of 30 seconds to 10 minutes are two separate control layers. Use short shots to test subject, action, and camera movement, then assemble multi-scene sequences.
- All six canvas card types are actionable nodes. When adding reference materials, clearly specify whether each one defines character, composition, action, camera, sound, or style.
- For longer videos, avoid generating everything in one pass. Fix bad takes locally by category—character, media, action/model, or narration/music—then review the full cut.
- The canvas handles organization and generation; the multi-track editor after Edit More handles pacing, sound, subtitles, and final delivery. Generation results are not the finished video.
What CapCut Video Studio actually is
This is a hands-on guide, not a product trend analysis. By the end, you should be able to do three things: find the Video Studio entry point, use Agent, Brief, Storyboard, and the generation models to produce your first multi-shot video, and know when you need to move into the CapCut multi-track editor for finer polish.
CapCut Video Studio is a canvas-based AI production workspace within CapCut Web. The "timeline-free" label means you don't have to confront a traditional timeline when you start. You can place text, images, video, and links on an infinite canvas, let the AI Agent help you shape a Video Brief and Storyboard, then generate content shot by shot. When you need precise control over rhythm, transitions, audio, and graphics, you can still click Edit More to open the multi-track editor.
It stitches together work that used to live in separate tools: ideation → structure → storyboard → generation → revision → fine-cut → export. The most important thing to remember is not the "one-click" part, but that each step leaves room to revert, replace, and keep editing.
- 01Define goalPurpose, audience, duration, aspect ratio
- 02Add assetsImages, videos, links, character references
- 03Create briefLet the Agent lock direction and constraints
- 04Review storyboardCheck action, information, and continuity shot by shot
- 05Generate shotsStart with key shots, then batch-generate
- 06Fine editEnter multitrack editing with Edit More
- 07Review and exportFootage, sound, captions, specs
The product overview below is worth watching first. It shows not a single model in isolation, but how canvas, Agent, generation, and editing connect into one project.
Set expectations up front: Video Studio significantly reduces the cost of organizing assets and building a first draft, but it will not automatically handle aesthetic judgment, fact-checking, or the final edit for you.
Where to enter: web and PC paths
Web entry
Open CapCut Video Studio or CapCut Agent, sign in, and go to the AI Creator / Video Studio section to reach the canvas. The homepage name, button positions, and available models can vary by account, so follow what your account actually shows.


PC entry
On the CapCut PC home page, go to the AI creation area, then open Video Studio. Both web and PC support the full flow from prompt, reference assets, generation, adjustment, and export. The PC entry clusters Style, Voice, Avatar, Duration, Aspect Ratio, and the Edit More desktop editor more tightly. Button specifics still depend on your current account interface.


If you don't see the same entry points, check three things: your account region, client version, and whether your account is included in the current staged rollout. Don't assume you're doing something wrong just because a button is missing—CapCut features change by region, device, language, account, and over time.
Shortest onboarding path: run one full pass first
For your first use, don't try a long film, complex characters, and a dozen visual styles all at once. Make a short video of 20–40 seconds, 3–5 shots, one lead character, one core action, and run the whole path end to end.
Step one: describe the goal clearly
In the input box, write out these five things first:
- End use: ad, narrative short, explainer, social media, or product demo.
- Target audience: who's watching, and what they already know.
- Core message: the one sentence viewers should remember.
- Format constraints: duration, aspect ratio, language, narration needed, on-camera appearance.
- Assets that must be kept: character reference images, product shots, logo, links, or existing video.
Here's a starting template you can use directly:
Make me a 30-second vertical short for young people new to camping. The core message is "you only need five things for your first camping trip." Use a relaxed, realistic outdoor style. 5 shots total, Chinese narration and subtitles. Generate a Video Brief and Storyboard first; don't generate the final video yet.
Step two: let the Agent build a Brief before racing to export
The Brief's job is to lock the direction: video goal, audience, narrative approach, visual style, pacing, characters, narration, and delivery format. Revising the Brief is far cheaper than scrapping a generated video and starting over.
Step three: check the Storyboard
Go through each shot checklist-style: does every shot advance the information or story? Are adjacent shots redundant? Are characters and scenes continuous? Can the narration fit the planned duration? If something's off, tell the Agent directly: "remove shot 3," "make shot 2 a close-up," or "keep the lead's outfit consistent with shot 1."
Step four: generate shot by shot, then as a whole
Test the most critical or most difficult shot first. Once that key shot works, batch-generate the rest. This surfaces problems with character design, art style, or model choice early, instead of burning a lot of credits at once.
Step five: move to Edit More for final control
The canvas is for organizing and generating; the multi-track editor is for precise cutting. At minimum, check the following before you call it done: shot lengths, transitions, narration-to-picture sync, subtitle line breaks, music levels, first and last frames, and export aspect ratio.
Watch the Basic Creation Workflow tutorial to get familiar with the entry point, canvas, and generation buttons. Then watch the Master Creation Workflow tutorial to understand how Video Brief, Storyboard, per-shot revision, and Edit More connect into a complete workflow.
Click any video to play.
Seedance 2.0: get one usable shot going
The shortest path has two steps: open Video Studio and click Try Seedance 2.0; enter a prompt and generate—the result drops back into your current canvas. Here's the entry point.

What a workable video prompt should contain
Don't just write "a person in the rain, very cinematic." A more reliable structure is:
Subject and appearance + action + environment + camera movement + composition/shot size + lighting and style + time progression + negatives
For example:
A young woman in a dark gray trench coat stands at a nighttime Tokyo intersection, rain falling in front of neon signs. She looks down at her phone, then raises her head toward something off-screen. The camera pushes slowly from a medium shot to a close-up, shallow depth of field, wet pavement reflecting blue-purple lights, realistic cinematic look. Keep the character's face and clothing stable. No extra people. No hairstyle changes.
After generation, revise in this order: check whether the subject and action are correct, then camera movement, then style, and only then small art-direction details. If you change ten things at once, it's hard to tell which one improved or broke the result.
Below are three short examples—cartoon, sci-fi, and cinematic—to show the stylistic range. Treat them as prompt-direction references, not a guarantee of the quality you'll get on every generation.
Click to play; each of the three short samples can be looped independently.
Image and video generators: when to pick which mode
Video Studio lets you switch between Image and Video modes. On the image side, you might see options like Seedream or Nano Banana. On the video side, you might see Dreamina Seedance, Sora, or Veo. Model names and counts change dynamically, so just use the model menu shown for your current account.


First, distinguish per-shot parameters from total video length
| Object | What it controls | Options you may see in the UI | First-time choice |
|---|---|---|---|
| Single-shot generation | One clip from one model run | 5, 8, 10, 12, 15 seconds; 720p; landscape, portrait, square, and other ratios | Use 5–10 seconds to test subject, motion, and camera work; extend once the shot works |
| Full video | A multi-scene film assembled from Brief and Storyboard | Some entries offer 30 seconds to 10 minutes | Still keep the first project to 20–40 seconds, 3–5 shots; confirm consistency and credit usage before going longer |
A per-shot limit of 15 seconds doesn't mean the whole video can only be 15 seconds. And a 10-minute full-video option doesn't mean generating one continuous ten-minute clip—it's built from multiple scenes, narration, music, and editing structure. Resolution, duration, and aspect ratio vary by model, account, and entry point, so just follow what the current menu shows.
Choosing models: don't just look at names
- Image side: when you need character, product, or composition consistency, prioritize models that emphasize consistency and multi-image editing; when you want to explore many directions at once, prioritize models that support batch input/output.
- Video side: use text-to-video when you have no reference assets; use image-to-video when you have a finalized first frame; use reference-based video when you need to carry over character, action, camera movement, or audio pacing.
- Cost control: validate prompts with short durations and lower resolution first. Once the subject and action hold up, raise resolution or batch-generate.
Four common input modes
| Mode | Meaning | Best for | Most common failure |
|---|---|---|---|
| t2i | Text to image | Concept art, style exploration, cover thumbnails | Unstable character or product detail |
| t2v | Text to video | Brand-new shots with no reference | Subject, action, and camera movement interfere with each other |
| i2v | Image to video | Animating a finalized character, scene, or product | First frame looks great, then deformation sets in |
| r2v | Reference to video | Maintaining character, style, composition, or multi-object relationships | References conflict; the model can't tell which one takes priority |
When using multiple references, multi-frame control, storyboard-level edits, or batch generation, spell out what each reference is responsible for. For example: "Image 1 is for the character's face and clothing only; Image 2 is for composition only; Image 3 is for action only." If the entry allows video or audio references, you can let video carry motion and camera moves, and audio set the pacing or voice direction. If the current entry accepts only images, don't write prompts that assume it can read video or audio. Don't let multiple references fight over character, action, background, and style at the same time.

Agent, Brief, and Storyboard: turning raw ideas into structure
When you only have a vague idea, the Agent's right job isn't to write you a "longer prompt." It should help break the project into checkable intermediate artifacts.
Agent: ask follow-up questions to fill gaps
You can ask it to probe you before generating:
I want to make a 45-second short about an independent coffee shop. Don't generate any video yet. Ask me the 6 most critical questions to help me pin down audience, narrative angle, characters, style, narration, and the call to action at the end.
After you answer, ask it to summarize everything into a Brief. If the suggestions get too generic, tighten them: "no brand fluff, every shot must show visible action," "the first 3 seconds must introduce conflict," or "only one character is allowed in the whole video."
Video Brief: lock the direction first
A usable Brief should include at minimum: the goal, audience, core message, duration, aspect ratio, narrative structure, characters and scenes, visual style, narration/music, and what must appear versus what is banned. Treat the Brief as your acceptance criteria, not a pretty creative statement.
Storyboard: turn the direction into shot-level tasks
Each Storyboard shot needs at minimum: the visual subject, action, environment, shot size or camera move, shot duration, narration/dialogue, and transition relationship. When checking, ask yourself: if I delete this shot, does the information or story take a hit? If not, it probably should be cut or merged.
Full video: how to interpret "30 seconds to 10 minutes, one-click generation"
Even if your current account supports full videos from 30 seconds to 10 minutes, don't jump straight to a long format on your first attempt. Start with a 20–40 second piece built from 3–5 shots to test the full pipeline: Brief, Storyboard, generation, and fine-cut. Once you've confirmed that character continuity, voiceover sync, and credit consumption all hold up, you can extend the duration section by section. The exact durations available will depend on the current interface.
Here's the recommended workflow for full videos:
- Start with a template, or have the Agent generate a Video Brief.
- Confirm the topic, audience, duration, aspect ratio, characters, voice, and visual style.
- Have the Agent expand the Brief into a Storyboard.
- Review each shot for information accuracy and continuity, making changes to characters, music, text, or voiceover as needed.
- Generate the key shots first, then fill in the remaining scenes.
- On the canvas, replace failed shots, trim repetitive sections, and add reference images.
- Preview the full cut; if only minor tweaks are needed, export directly.
- For precise control, click Edit More on a Storyboard card to open the multi-track editor.


Fixing a broken shot by problem type, not by starting over
- Face changes or outfit drift: Return to the scene, re-specify the character reference, and run character regeneration. Change only the character; don't also alter the scene or camera movement.
- Wrong visual content: Directly replace the media for that shot. Choose My media for existing assets, Stock media for library footage, or AI media for fresh generation.
- Incorrect action, style, or camera language: Update the prompt, reference assets, or generation model in the input area below the scene. Only redo that single shot.
- Wrong voiceover or presentation style: Adjust the Narrator, Avatar, or Voice back in the Video Brief/Storyboard. If the music isn't right, swap it out via Music—don't try to fix audio issues by regenerating visuals.
- After local fixes: Play the full video to confirm transitions between shots, then enter Edit More to handle cut points, captions, mixing, and transitions.
Longer videos are more prone to cumulative errors: character faces drift shot by shot, voiceover falls out of sync, pacing becomes repetitive, and factual statements contradict each other. The longer the piece, the more you should validate it in segments rather than relying on a single generation pass.
The multimodal canvas: cards as assets and action triggers
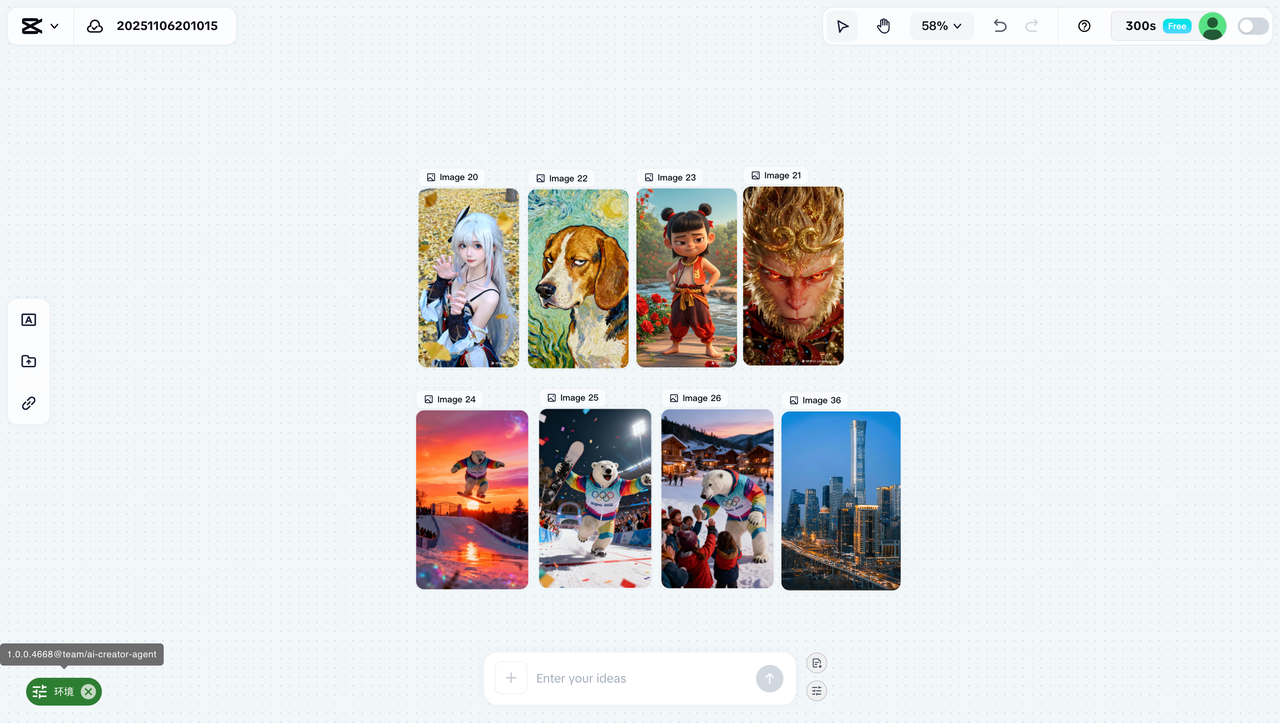
The canvas supports cards for Text, Image, Video, Link, Video Brief, and Storyboard. These aren't just static folders; they're nodes you can act on. Text can be rewritten or expanded into new tasks, images and videos can serve as references, links preserve external page context, Briefs can be tweaked for production parameters, and Storyboards can generate, replace, and fine-cut shot by shot.
Click the screen recording to see card operations; image cards can be clicked to enlarge.

Here's how to use each of the six card types:
- Text: Store requirements, script passages, character rules, and revision notes. Select content and hand it to the Agent to rewrite, expand, or turn into the next task.
- Image: Use as a reference for characters, products, scenes, composition, or style. In the prompt, specify exactly which one it covers.
- Video: Preview existing clips and use them as input for action, camera movement, pacing, or shots you plan to replace.
- Link: Keep web URLs alongside project assets so links and materials don't get scattered. Still, be explicit about what information you need extracted before using it.
- Video Brief: Centralize changes to full-video settings like Style, Voice, Avatar, Duration, and Aspect Ratio.
- Storyboard: Review shot by shot, generate and replace media, adjust voiceover and music, then head to Edit More for multi-track editing once confirmed.
Here's a suggested way to organize the canvas:
- Put Briefs, character settings, and visual references on the left as a stable baseline that won't change often.
- Keep Storyboards and generated outputs in the middle, in scene order.
- Place discarded versions, alternate takes, and assets that need further processing on the right.
- Use adjacent Text cards to record version notes, like
S03 night close-up v2|camera movement only|character and outfit unchanged. Don't rely on thumbnails to guess what changed in which version. - Group front, side, outfit, and expression references for the same character together, and note each one's purpose in the prompt.
The canvas reduces lost context, but it can't guarantee the Agent will automatically understand the priority of every image. You still need to spell out in your input which object to use, what to keep, what to modify, and what must not change.
Six advanced creation modes: storyboards, characters, multi-image remix, batch sets, covers, and styles
1. Comic storyboards
Break a story into frames with clear actions, and require the model to follow the reference image for character design and visual style. For example: waiting at the airport → looking out the plane window → arriving at your dream school. Action, location, and emotion should all shift; otherwise, three frames will just be repeats of the same image.


2. Film storyboards
Film storyboards require more than just characters and scenes—you need to specify camera relationships. A sample task: use two reference female characters to generate a nighttime "female assassin" film storyboard. In practice, you should also spell out the shot size for each frame, character blocking, light sources, and how each shot connects to the next.

3. Character design and consistency testing
Don't just ask the model to "generate the same person." A more effective task is to generate the same character across six angles, five scenes, or eight styles as a set, then check the stable identity traits: face shape, hairstyle, clothing colors, signature accessories, and perceived age.

4. Multi-image remix
For multi-image tasks, state what each image is responsible for. For instance: "Image 1 provides the female character, Image 2 provides the male character, and Image 3 only supplies the pose. Put both people in one frame without inheriting the appearance of the person in Image 3." This is far more reliable than a vague instruction like "combine these three images."

5. Image editing and batch sets
When you already have an image that's close to what you want, don't regenerate from scratch. Break the change into a single task, like "only change the jacket to dark blue; keep the face, pose, background, and lighting unchanged." For character sheets, product angles, or social media image sets, lock down the invariants first, then batch-change one dimension at a time—angle, scene, or style. Changing just one variable per round makes it easier to tell what caused any drop in consistency.
A practical batch prompt might look like this:
Using the same character and the same outfit, generate 6 images at 1:1. Keep the face, hairstyle, clothing color, and earrings consistent; vary front view, left side, right side, half-body, full-body, and sitting pose. Use a uniform light gray studio background and no text.
6. Video covers and style exploration
Covers should solve information hierarchy before aesthetics: who's the subject, where does the title go, is it recognizable at thumbnail size, and have you left a safe zone for platform UI. You can batch-explore cover ideas first, then pick one to bring into CapCut and add real text. Don't expect the image model to render long titles accurately.


The style library is a quick way to try preset directions such as Realistic Film, Cartoon 3D, Future Tech, Pixar-Style, Retro Pixel, Claymation, Cyberpunk, and Ghibli-style. Presets are fine for exploration; for real projects, you should still codify your own visual spec for characters, color, materials, camera, and lighting.


Camera movement and VFX: writing prompts as executable directions
The most common failure in camera movement prompts is listing terms without defining the spatial relationship between camera and subject. Push in toward what? Follow from the front, side, or behind? Orbit around which center, by how much, and is there a rise or fall at the same time? All of this needs to translate into visible motion.
Here's a recommended structure:
Camera starting point → Camera movement → Tracking target → Subject action → Environment change → Final framing → Speed and mood
Below, six representative camera moves break this down. As you play them, watch whether the camera motion revolves around a clear subject, and whether you can describe both the starting and ending frame.
Click each video to play and compare with the description.
VFX should also be written as events, not just "add cool effects." Specify when the effect appears, where it comes from, how it affects the character and environment, and when it ends. For example: "At the moment of impact, cracks radiate outward from under the character's feet. Blue energy lights up along the cracks, debris floats briefly, then settles. The camera holds a medium-wide shot."
Click each video to play.
Asset library and Smart Edit: packaging generation results into a finished video
Video Studio's edge isn't just the generation models—it can tap into CapCut's Voiceover, Avatar, Caption, Music, Stock media, and Smart Edit tools.
Smart Edit is good for fast, basic packaging like highlighting keywords, adding music, stickers, and effects. What it saves is mechanical time; it won't replace your judgment on pacing or information hierarchy.


Voiceover, Avatar, Caption, cloning, and credit policies can shift with your account and plan version. Before you start serious production, check the current menu for what's available, any costs, and export restrictions.
Editing, export, and pre-publishing checks
A generated output isn't a finished video. After clicking Edit More on a Storyboard card to open the multi-track editor, review in this order:
- Structure: Does the first 3–5 seconds establish a problem or conflict? Is every shot necessary? Does the ending close the loop on information or action?
- Visual continuity: Does the face, hair, outfit, props, direction, time, or weather suddenly change?
- Editing rhythm: Do shots drag? Do actions complete at the cut point? Do transitions draw more attention than the content?
- Audio: Is the voiceover clear? Does music overpower the voice? Do ambient sounds break abruptly? Is loudness consistent across clips?
- Captions: Check for typos, proper nouns, numbers, punctuation, line breaks, and screen safe zones.
- Facts and branding: Are product names, data, logos, prices, person identities, and quotes accurate?
- Export spec: Does orientation, resolution, frame rate, bitrate, cover, and file naming meet the target platform's requirements?
First check the range of genres, then validate with one full sample
The showcase groups the work into Classic Movies, Creative Toons, Sci-fi Films, Art Film, Deep Knowledge, Visual Marketing, Short Drama, and Wild Dream. That range shows how far the workflow can stretch—not a guaranteed quality bar for any model or account.


The most reliable validation method: watch once on mute, checking only visuals and captions; listen once with eyes closed, checking only voiceover, music, and pacing; then play the full video on your phone to confirm small-screen readability and platform cropping.
Handling account and version inconsistencies
These items change frequently, so confirm them directly in your current account before production:
- "300+ free credits" and "Seedance 2.0: 1 free use."
- The "9 models" and specific menus for Seedance, Sora, Veo, Nano Banana, and others.
- "Full videos from 30 seconds to 10 minutes."
- "45+ styles, 300+ voices, 500+ avatars, 200+ captions."
- Whether voice cloning and avatar cloning are free, plus the credit cost for different features.
Don't plan production around fixed numbers. Start by generating a 10-second test shot and record the available models, estimated credits, generation time, resolution, and export limits. Only after that test passes should you scale up. Demo videos are useful for studying structure, pacing, and packaging—they don't guarantee your current account can reproduce the same quality at the same cost.
Direct links:
If you remember only one principle: get the structure right with the Agent and Storyboard first, use generation models for the shots, then finish with multi-track editing to turn it into something you can actually publish.
Members can copy or download the full Markdown, and let their AI subscribe and ask.
Found this useful? Leave your email — every new explainer, the moment it's out. Unsubscribe anytime.